by Jack Dec 10,2025
『Dragon Nest: Rebirth of Legend』でキャラクタークラスを選択することは、単なるダメージ数値以上の意味を持ちます。各アーキタイプは、独自のゲームプレイメカニクス、習得までの学習曲線、そしてチームでの役割を提供します。荒々しい近接戦闘を好むか、計算されたサポートプレイを好むかに関わらず、その選択はあなたのMMOにおける旅全体を根本的に形作ることになります。
このゲームは4つの核心クラス - ウォーリアー、アーチャー、メイジ、プリースト - を提示しており、それぞれは従来の強さランキングではなく独自の個性を持っています。ここでは、それらを二つの重要な側面 - 総合的な有効性(全てのゲームコンテンツにおける効果性)とアクセシビリティ(新規プレイヤーにとっての扱いやすさ) - から評価します。あなたの判断材料となる必須情報をご紹介します。
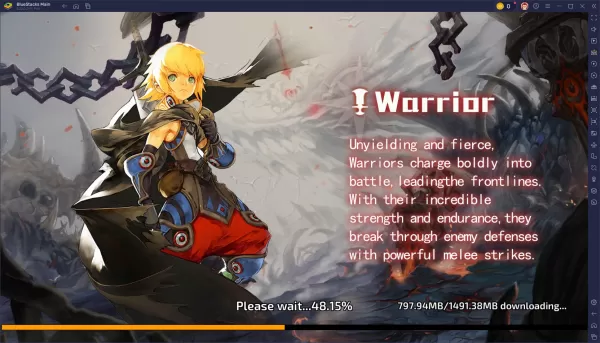
総合評価: 4/5
扱いやすさ: 5/5
ウォーリアーは、選択可能なクラスの中で最も取り組みやすいクラスを体現しています。接近戦を専門とし、信頼性の高い耐久性と安定したダメージ出力を誇ります。そのコンボシステムは直感的に実行でき、フレーム単位の完璧なタイミングを要求されない有効な、反応性の良いスキルアニメーションを備えています。
このクラスは、ハイリスク・ハイリターンのビルドを好み、ポジショニングとクールダウン管理を極めることができるプレイヤーにとって卓越しています。メイジはより急峻な学習曲線を提示しますが、リズムベースのゲームプレイを習得した際には格別な満足感をもたらします。
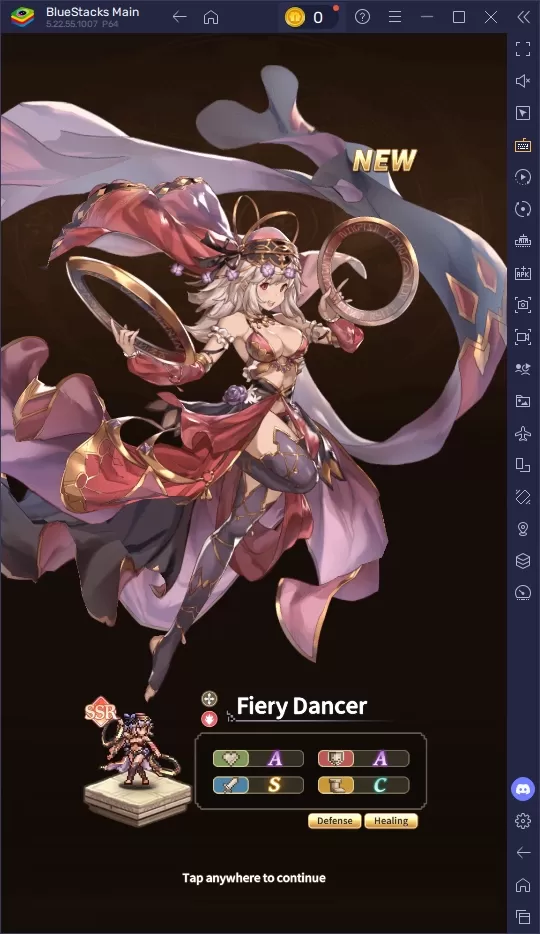
総合評価: 3/5
扱いやすさ: 2/5
プリーストは、直接的なダメージ出力ではなく、ヒーリング、チームバフ、戦術的な有用性に焦点を当てた特化したサポート役として際立っています。その真の潜在能力は、協力プレイのPvEや競争的なPvPシナリオにおいて発揮され、熟練したサポートプレイヤーは結果を劇的に左右することができます。
しかしながら、単独でのダメージ能力の限界と複雑なメカニクスは、新規参入者にとって課題を生み出します。チームの基盤となることを楽しみ、計画的で戦術的なゲームプレイを好むなら、プリーストはやりがいのある可能性を提供します - ただし、専用のパーティーなしでプレイする場合は、進行が遅くなることを覚悟する必要があります。
どのクラスを選択しても、BlueStacksを介してPCで『Dragon Nest: Rebirth of Legend』をプレイすることで、最適なゲームプレイが実現します。強化されたコントロールスキーム、優れたパフォーマンス、そして包括的なキーバインド設定により、より緊密なコンボ実行とより正確な移動が可能になります - これは、クラスの潜在能力を最大化することが最も重要となる高強度の戦闘遭遇時に特に重要です。
ドールズフロントライン 2: Exilium Global Website がソーシャル機能とともにライブ配信されます!
マーベルライバル:バスを理解し、それをキャッチします
Assassin's Creed Shadowsの新しいゲームプラス:確認されましたか?
アサシンの信条の影でYasukeに優先順位を付けるための最高のスキル
Assassin's Creed Shadowsの動きは、2人のパルクールアスリートによってレビューされました
Death Stranding 2リリース日は、大規模なトレーラーで発表されました
ポケモンゴーリークは新しいアドベンチャー効果をからかいます
Amazon Music Unlimited:無料の3か月間のトライアルが利用可能です
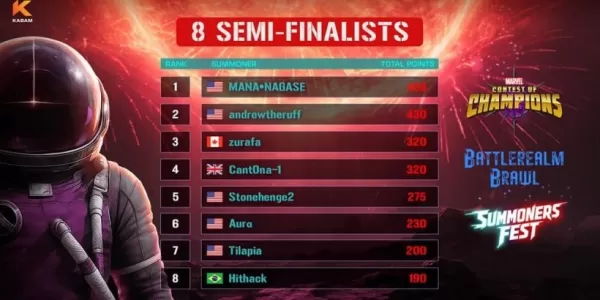
バトルレルム・ブロウル、マーベルコンテスト準決勝進出者発表
Apr 25,2026
果てないランクアップ:ピクセルサガ-進捗を加速するための最高のコツとテクニック
Apr 22,2026
フォレタレス:カードゲームが終末の運命を形作る
Apr 20,2026
Once Human is a fast-paced, sci-fi survival RPG blending immersive PvE exploration with intense PvP combat. Whether you're diving into the alien ruins, surviving the toxic wasteland, or clashing with rival players, choosing the right build is key to success. Below are optimized PvE and PvP builds for Once Human, based on current meta (as of 2024–2025), character roles, and balance. 🎯 Core Gameplay Overview Classes: Scout, Engineer, Medic, Soldier, Tech (each with unique roles) Playstyles: Stealth, tanking, damage, support, hybrid Progression: Unlock abilities, customize loadouts, upgrade weapons and armor Key Mechanics: Cooldowns, energy management, crowd control, environmental interaction 🔥 Best PvE Builds (Solo & Group Raids) Perfect for surviving alien threats, exploring ruins, and completing story missions. 1. The Relentless Medic (Support/Healer) – PvE MVP Class: Medic Role: Healing, buffing, utility Why it works: Keeps your team alive through high-damage bosses and endless enemies. 🔧 Build Specs: Primary Weapon: Syringe Launcher (heals on hit, inflicts status) Secondary: Bio-Hack Grenade (stuns, slows, heals allies) Passives: Regen Pulse – Heals allies in radius every 5s Adrenaline Surge – 30% speed boost + 10% healing Field Med Kit – Instant revive (1 use per mission) 🧩 Loadout: Healing Beacon (deployable, auto-heals team) Health Regen Armor (increases healing received) Emergency Bandage (30% heal on kill) ✅ PvE Tips: Stay in cover behind tanks. Use Bio-Hack Grenade to control hordes. Prioritize reviving fallen allies in boss fights. 🏆 Best For: Raids, high-level dungeon runs, team-based missions. 2. The Iron Wall (Tank/Melee) – Frontline Protector Class: Soldier Role: Tank, crowd control, decoy Why it works: Absorbs damage, holds aggro, protects squishy teammates. 🔧 Build Specs: Primary: Plasma Repeater (high burst, close-range) Secondary: Shock Baton (stuns, 100% uptime CC) Passives: Shield Bash – Stun on block Vitality Armor – 40% reduced damage when below 30% HP War Cry – Decreases enemy damage by 15% in range 🧩 Loadout: Heavy Combat Shield (blocks 80% of incoming damage) Sonic Pulse Grenade (knocks back enemies) Reinforced Armor Set (reduces fall damage) ✅ PvE Tips: Use Shield Bash to interrupt enemy abilities. Position yourself between the boss and your team. Use War Cry to make bosses focus on you. 🏆 Best For: Boss fights, front-line push, solo challenging dungeons. 3. The Phantom Scourge (Stealth DPS) – Solo Explorer Class: Scout Role: Assassin, scout, burst damage Why it works: Silent kills, high mobility, ideal for solo play. 🔧 Build Specs: Primary: Shadow Stalker Rifle (silent headshot, 1-shot kill at range) Secondary: Cloak Device (20s invisibility, 3 uses per mission) Passives: Shadow Step – Teleport 10m with 1.5s invisibility Phantom Sneak – +50% movement speed in shadows Silent Assassin – 300% damage bonus to backstab 🧩 Loadout: Acid Dart Grenade (poison + bleed over time) Stealth Cloak Armor (reduces enemy detection chance) Night Vision Goggles (see through fog) ✅ PvE Tips: Use Shadow Step to flank enemies. Kill sentries silently before alerting others. Focus on high-value targets (scouts, medics). 🏆 Best For: Solo exploration, hidden objectives, night missions. 🌪️ Best PvP Builds (Player vs Player) Designed for chaos, map control, and quick eliminations. 1. The Devastator (Melee Assassin) – PvP King Class: Scout (specialized) Role: High-risk, high-reward assassin Why it works: Fast, silent, and lethal at close range. 🔧 Build Specs: Primary: Flesh Ripper Knife (1.5s to kill, 30% bleed) Secondary: Grapple Hook (teleport to enemy, 20m range) Passives: Killer Instinct – 50% faster reload when under 30% HP Silent Death – 100% critical chance on backstab Blade Storm – 3 rapid slashes (20% chance to spawn a clone) 🧩 Loadout: Eclipse Cloak (invisible for 1.5s when not moving) Berserker Gauntlets (increased melee damage, bleed) Magnetic Pull Grenade (pulls enemies into your kill zone) ✅ PvP Tips: Use Grapple Hook to surprise enemies mid-strafe. Circle back for backstabs in open areas. Avoid open fights — ambush from cover. 🏆 Best For: Control maps, capture points, assassinate high-value targets. 2. The Stormbringer (Area Control DPS) – PvP Dominator Class: Engineer Role: Zone control, AoE damage, trap master Why it works: Controls space, disables groups, dominates objective zones. 🔧 Build Specs: Primary: Tesla Coil Rifle (electrifies area, shocks multiple enemies) Secondary: Remote Mine (triggered by footstep, 300 damage) Passives: Overload Field – 10m explosion every 10s (AoE damage + stun) EMP Pulse – Disables enemy gadgets for 5s Trap Master – 2x trap capacity, 30% faster trap setup 🧩 Loadout: Laser Tripwire (triggers mines remotely) Anti-Gravity Field (slows and pulls enemies) Rapid-Fire Grenade Launcher ✅ PvP Tips: Set up mines in choke points and spawn areas. Use Overload Field to clear enemy pushes. Combine EMP Pulse with traps to disable healers. 🏆 Best For: Control maps, objective defense, team fights. 3. The Iron Bastion (PvP Support/Tank) – Unkillable Wall Class: Soldier (tank build) Role: Flag carrier, point defense, tank Why it works: Survives long fights, protects team, absorbs damage. 🔧 Build Specs: Primary: Heavy Plasma Cannon (high-damage, slow fire rate) Secondary: Stun Grenade (1.5s knockback + 1.5s stun) Passives: Last Stand – 50% damage reduction when under 20% HP Shield Wall – 30% chance to reflect 25% damage on block Battle Cry – Increases team damage by 15% in 10m radius 🧩 Loadout: Kinetic Armor Plate (blocks 70% of melee damage) Cryo Trap (freezes enemies for 2s) Shield Generator (self-revive, 20s cooldown) ✅ PvP Tips: Carry the flag while tanking enemy pushes. Use Shield Wall to reflect enemy abilities. Position near objectives to deter attackers. 🏆 Best For: Flag capture, point defense, team duels. 🎮 General Tips for Both PvE & PvP Tip Reason Always carry 1–2 healing items Critical in both modes, especially in PvP. Use environment Hide behind pillars, use walls to block shots, lure enemies into traps. Master your class’ unique ability It’s often game-breaking (e.g., Grapple Hook, Bio-Hack Grenade). Rotate builds Try different loadouts to adapt to new maps and meta changes. Play to your strengths Don’t be a Scout in a tank fight. Use roles strategically. 📌 Final Verdict: Top 3 Builds Mode Best Build Why PvE (Solo) Phantom Scourge (Scout) Silent, fast, deadly – ideal for solo content. PvE (Group) Relentless Medic (Medic) Keeps team alive; essential for raids. PvP (Match) Stormbringer (Engineer) Controls zones, dominates map objectives. 🔥 Pro Tip: Combine Medic + Engineer in your group for perfect synergy: Medic heals Engineer sets traps and disables enemy abilities Scout flanks Soldier tanks Team composition wins wars. Stay sharp, keep your gear upgraded, and remember: In Once Human, survival isn’t just about strength — it’s about smart choices. Ready to dive in? The ruins are calling. 🌑💥
Apr 17,2026
ギャラクシー防衛要塞TD:戦略で制覇する
Apr 16,2026
 カテゴリー
カテゴリー